Create and Use an Email Alias
January 04, 2021
At this point I believe we all have a "burner" email account or two. An email account we use when an email address is required from us, but we do not trust the person making the request. In addition to using email accounts that are 20+ years old, we can also create and use an email alias. Using an alias gives us more flexibility, allowing for us to track any misuse of our data.
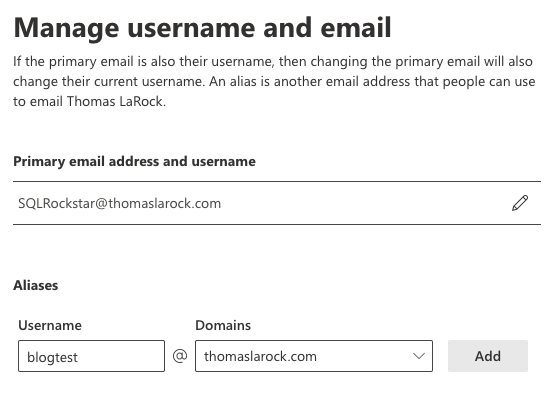
If you are using Office Microsoft 365, you can create and use an email alias through your admin center. Navigate to your username and click 'Manage username and email'. In the blade that opens you can add your alias. I will add one named 'blogtest':
Click save and you are done, the alias is now ready to use. It is that simple. You can test it for yourself, here I sent blogtest an email:

Now, since this is an alias, the email arrives and looks as if it was sent to my primary email address. The whole idea of me giving you an alias is because I don't want your spam in my inbox. So, we need to filter the message. Fortunately, Outlook has a way for us to create a rule that will filter for keywords in the message header. Here, I will create a rule that will redirect the email to a folder named Blogtest:

Now, the next time someone sends an email to the alias, it will arrive in the folder.

Create and use an email alias is a great way to track your data being shared, bought, sold, or stolen. I use them often, especially when I know a company that has my data is being merged, or is closing.